Creating the Best-Looking Renders
Okay, you've purchased Poser 4 and you've started to play around with the models, but you can't get the scene to look good. What's going on? You have a character, added some hair, (maybe some clothes), and a background, but it still looks "fake". Here's a tutorial to get the best-looking render, using only Poser (with no "post work"). And, no, you don't need a "super-computer" to get great results with Poser.
Note 1: This tutorial uses Poser's basic light set to render the scene. Feel free to experiment with Poser 6's AO/ IBL light sets for even more realism.
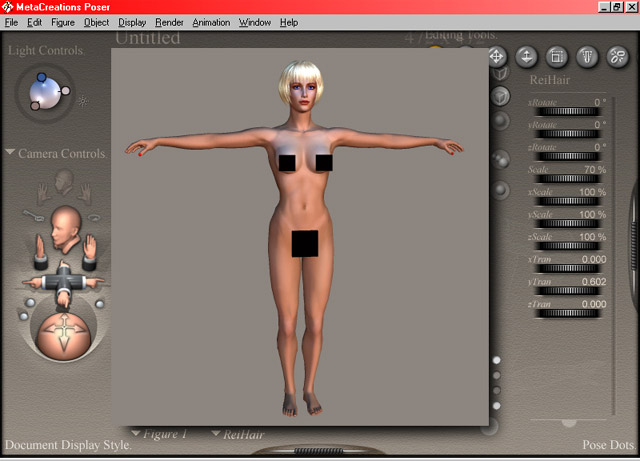
Note 2: For the screen shots on this page, the figure will be shown without clothing (so you can better see the texture map used on the figure). However, since some people (and possibly my web hosting company) may object to nudity (even in a "computerized" form), I will be using my own "censor boxes" to cover the characters "private parts".
Applications used:
Poser 4 (yes, only Poser!)
Steps:
- Start Poser (okay, that's obvious!) and completely clear the scene. You should have a blank, gray screen. (To check that you have a blank scene, look at the pull-down menu below the main window- it should say "No Figure". The other pull-down menu could say "No Actor" or "Main Camera".)
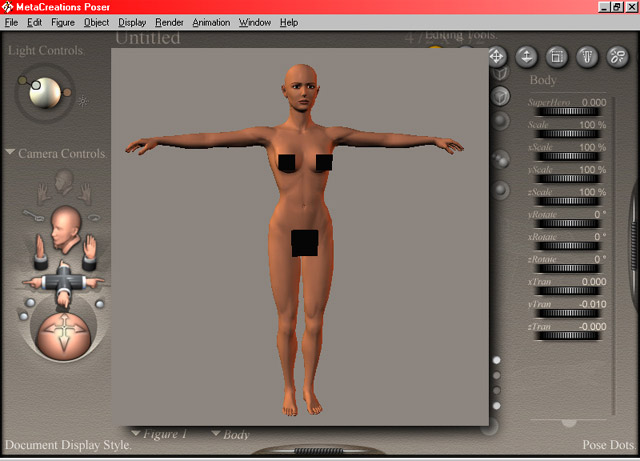
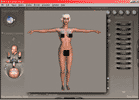
 Next, add a figure from the Library. Click on the "Figure" category, then the "People" sub-category, either the P4 Nude Man or P4 Nude Woman, and then click the "Create New Figure" (the
  button). (For this example, I will turn the P4 Female into a Sheri look-alike.) The scene should look like the screen shot to the right:
- Optional: if you are going to be posing this character, turn off "Inverse Kinematics" by going to "Figure" > "Use Inverse Kinematics" > "Right Leg" and "Left Leg".)
Optional 2: if you are going to add clothing, you may want to rename this character. Select "Body" from the second pull-down menu below the main menu. (The first pull-down menu should already say "Figure 1".)
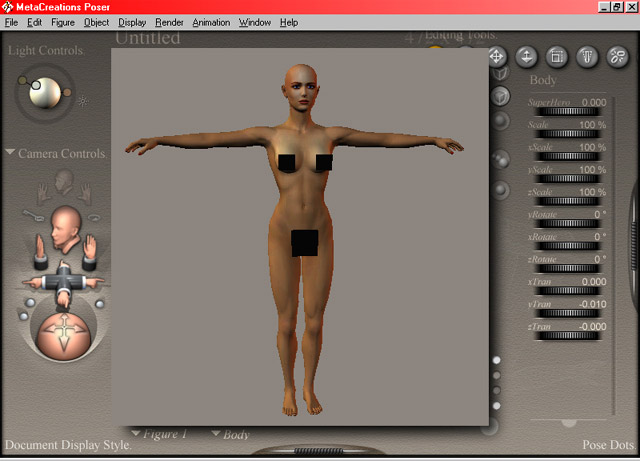
- The next step is to add a more realistic texture:
 Go to "Render" > "Materials" to open the "Surface Materials" box.
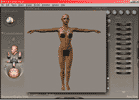
- By default, the P4 characters are automatically loaded with the "P4 man texture" or the "P4 woman texture" (which are both a little "flat") and a "peach-ish" color.
- Click the "Load" button to use a more realistic-looking texture. (For this example, I will use my own "Sheri" texture.)
- To quickly apply this texture map to the entire figure (instead of just the selected body part), click the "Texture changes apply to entire figure".
Note: do not use this checkbox when using the Vicky or Mike characters. Since they use separate texture maps for the head and body, applying one texture map to all the body parts will give strange results!
- Since we're using a texture map to color the figure, we don't need the "peach-ish" color. Make sure the pull-down on the right says "skin", click on the "Object Color" button, set the color to white (R: 255, G: 255, B: 255), and click the "Ok" button to close this box.
- Click the "Ok" button when done. Your character should now have the new texture.
Note: the texture may look a little dark- this is okay. We will be adjusting the lights in a few more steps, which will lighten the texture.
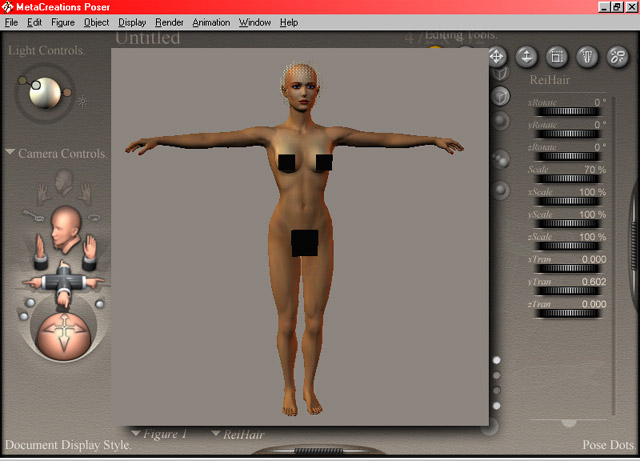
- Next, let's add some hair to our character:
 Click on the "Hair" category, then the "Male" or "Female" sub-category (if you've organized the hair this way), select a hair style, and then click the "Apply Library Preset" (the
  button). (For this example, I will use the "Rei" hair, found at the Digital Babes website.)
- The hair object will automatically "attach" itself to the top of your figure's head- you do not need to "conform" or move it.
Note: for the most realistic looking hair (and hair textures), I suggest downloading the hair found at: Digital Babes site (and click the "Download & Tutorial" link). (Note: this site is in Japanese, but you should be able to tell what's what by looking at the pictures!)
Note 2: since many hair objects use transparency maps (including the "Rei" hair), you will not see it completely until you render the scene. This is due to the way Poser handles transparency maps.
- Now, we'll light the scene. This part is probably the most subjective of all. The lighting of the scene, like in real life, depends on the mood you want to create. Do you want a bright, "studio" setting, a "warm" setting, a "cool" setting, an "outdoor" setting, or even a "global-illuminated"/ "this is a computer-generated model" look?
 Note: for more information, I suggest visiting photography websites to see how professional photographers light their scenes.
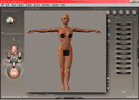
- Click on the "Lights" category, select a sub-category (if you've organized the lights this way), select a light "preset", and then click the "Apply Library Preset" (the button). (For this example, I will use the "PhotoLight" light, found in the Illustrender lighting set.)
Note: there is no "best source" for lights (as there is for textures or hair styles), but feel free to peruse the selection at some of the Poser community sites. Or, you could try making your own by adjusting the colors of the existing lights or by adding more lights to the scene.
- Using a "global light" with soft shadows set will increase the realism as well, though it will increase rendering times.
- In Poser 6, you have the option to use Ambient Occulsion and Image Based Lighting. These two forms of lighting will make the render much more realistic (especially when you use a background image which matches the lighting).
- Another question to ask yourself is whether or not you want cast shadows in your scene. Shadows tend to make things look more "real" and less "flat", but shadow calculations will increase render times, especially if you have a lot of lights in your scene.
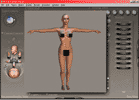
To enable shadows in the scene, go to "Render" > "Render Options" and check the "Cast Shadows" check box.
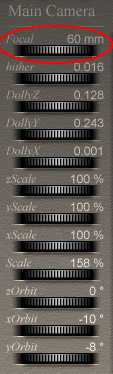
 At this point, you'll need to decide which camera you'll use to "shoot" the scene. (To keep things easy, I usually use the "Main Camera", but both the "Aux. Camera" and the "Posing Camera" can do the job. Experiment with each camera to see which one suits your taste.) To make your characters look their best, be sure to set the "Focal Length" of the camera to a value way above the default setting of 38mm:
- In the "Camera Controls" pull-down menu, select the "Main Camera". (In this example, the "Camera Controls" are located just below the "Light Controls", to the right of the scene.)
- Click on the "Rotation Trackball" (the "ball" with the four arrows, just under the "hands"). This will make the camera the "active object" to work with.
- Change the "Focal" control a higher number- anything from 70 to 90 to 100 to even 120. (In this example, I'll use "60".)
 From here, you can change a number of things to further improve the scene:
- adding clothing (and adjusting/ colorizing the clothing)
- changing the character's pose (Be sure to "lock" the hair before posing your character- see the General Tips Page for more information about "locking" hair.)
- changing the background (you could use a "background image", an existing room "prop", or "composite" this figure onto an image)
- adding additional "props": furniture, dishes, etc.
- additional post-production or "special effects" work in Photoshop, Paint Shop Pro, or even Painter
I'll leave those changes up to you!