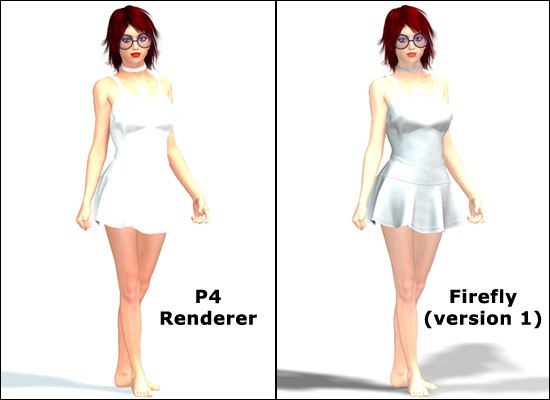
Comparison images rendered with the P4 Renderer and FireFly Renderer
(As you can see by the image on the right, the skin tones in FireFly-rendered version seem washed out and the shadows on the ground are wrong.)
I render a lot of my artwork with the Poser 4 Renderer because of the way I've "tuned" my characters. The look of my characters (especially my "Tabby" character) is a combination of the skin color, the skin brightness, and the lights in the scene. But, ever since Poser 5, I haven't been able to duplicate the same look using the FireFly Renderer. I later learned that this was caused by the way the FireFly Renderer interpreted the Ambient Color.
At first, this was a big issue for me since Poser 5 didn't even include the option to use the P4 Renderer... so I woubd up not using the program! When Poser 6 was released, the option to use the Poser 4 Renderer was put back in, but with a tweak: the option for "Ignore Shader Trees" needed to be checked.
However, when this option is checked, none of the FireFly effects will work, such as reflection, shader nodes, etc. If I needed these effects in my image, I would either render the scene twice (once using the P4 Renderer and once using the FireFly Renderer) and composite the two images, or give my characters a different coloring.
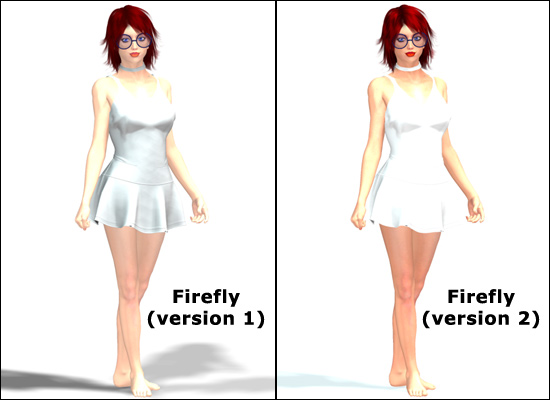
So, what's the solution? After years (yep, years) of tweaking and experimenting, I stumbled into talking about this issue with the Poser techs at Smith Micro. According to the tech, Stefan Werner, the technical explanation is: "...when rendering in the Poser 4 renderer with 'ignore shader trees' checked, the diffuse texture is also applied to ambient light. When using the FireFly shader trees, it is not. Also, with 'ignore shader trees' checked, the Poser 4 renderer ignores the shadow catch flag set on the ground plane."
Here are the steps to set your surface materials. Keep in mind that this process only works when the Ambient Color is any color except black (0,0,0) and the Ambient Value is anything except zero (0). Also, you should be familiar with connecting shader nodes in Poser's Material Room... but, not to worry- you won't have to do any complex shader node work.
 1. First, the obvious steps: 1. First, the obvious steps:
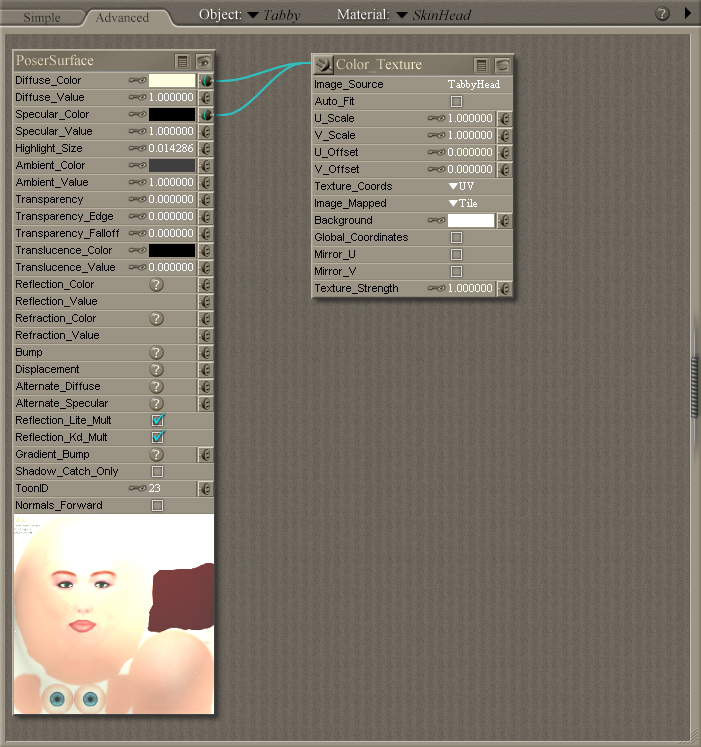
2. Go to the Material Room. 3. Click on any of your character's surface materials. (In this example, I'll work with the character's "SkinHead" material.) 4. In this example, the Ambient Color has already been set to dark gray (a value of 47,47,47) and the Ambient Value has been set to 1. |
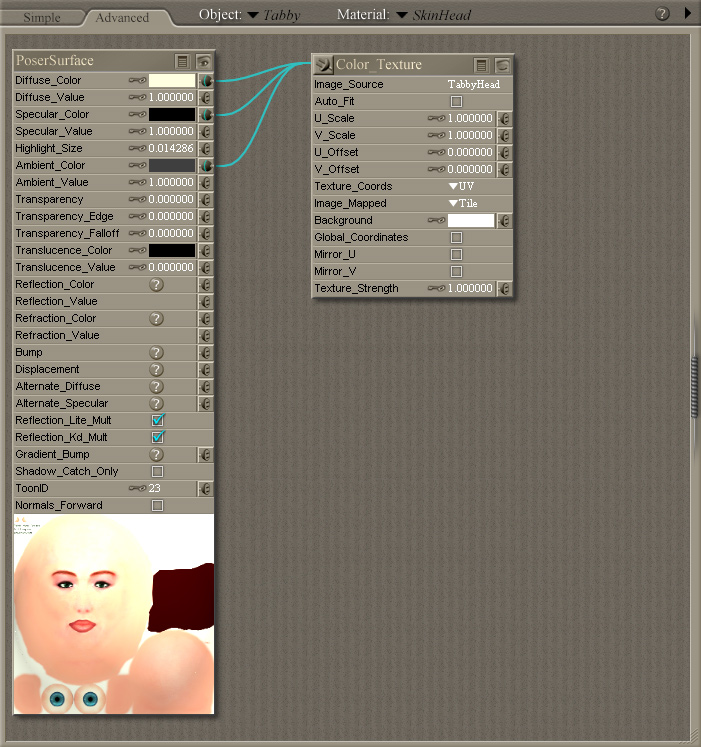 5. Drag a line from the PoserSurface > Ambient Color to connect it to the the Color_Texture node (the Texture Map). (See screen shot to the right.) 5. Drag a line from the PoserSurface > Ambient Color to connect it to the the Color_Texture node (the Texture Map). (See screen shot to the right.)
6. Repeat this process for all the materials. (Scroll down to the bottom of this page for a Python script to automate this process.) 7. When you're finished, I recommend adding the new material settings to the Library: just click the "+" (Add to Library) button and select the option for "Material Collection". 8. Optional step: Adjust any other materials while you're in the Material Room. 9. Option step #2: Select the Ground plane and uncheck the option for Shadow_Catch_Only (on the PoserSurface node, the third setting from the bottom). This will create the correct shadows on the ground. Note: make sure the ground has the correct color or texture for your scene. 10. Go back to the Pose Room, set your render options, and render the scene. |
Stefan was also helpful enough to send me a Python Script to automatically attach the Ambient Color to the Diffuse Color's texture map and to turn off the Ground's setting for "Shadow Catch Only". (And he was nice about allowing me to share this script with everyone else.) Click here to download the Python Script.
To make things easier, I recommend you extract the script to your Material Room Wacro "buttons" folder, which is located under: Runtime\ Python\ poserScripts\ Wacros\ UserDefined
Please note that this script has been tested (and works fine) in Poser 6 and 7. The script will not work in Poser Pro Pack, Poser 4, and below. Although the script has not been tested in Poser 5, and Poser Pro and above, it should work fine in these versions.
