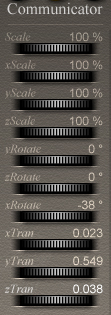
 Start Ray Dream Studio. (You should start with a blank scene.) Note: to make things easier, you may want to maximize the perspective window, turn on the 2 back "walls". Start Ray Dream Studio. (You should start with a blank scene.) Note: to make things easier, you may want to maximize the perspective window, turn on the 2 back "walls".
 First, we will create the silver, "A" part of the emblem: click on the "Free Form" Tool (the First, we will create the silver, "A" part of the emblem: click on the "Free Form" Tool (the  button) and drag it into the Perspective window. button) and drag it into the Perspective window.
  You should get a box that asks for the name of the Free Form object. Let's call it "Emblem" (type that word into the box and click the "OK" button). You should get a box that asks for the name of the Free Form object. Let's call it "Emblem" (type that word into the box and click the "OK" button).
 Go to "View" > "Preset Position" > "Drawing Plan" to create the object. Go to "View" > "Preset Position" > "Drawing Plan" to create the object.
 Using the "Pen" Tool (the Using the "Pen" Tool (the  button), click on the grid to create 4 points as shown in the screen shot to the right. Ray Dream Studio will automatically draw lines to connect the points, and clicking (a second time) on the first point will "close" the shape. (For now, don't worry if your shape is "pretty" or a different color, we will change both of these options later.) button), click on the grid to create 4 points as shown in the screen shot to the right. Ray Dream Studio will automatically draw lines to connect the points, and clicking (a second time) on the first point will "close" the shape. (For now, don't worry if your shape is "pretty" or a different color, we will change both of these options later.)
 Now, use the "Selection" Tool (the Now, use the "Selection" Tool (the  button) to move the points. Make the bottom-left and bottom-right points an equal distance from the top-center point. Move the middle-bottom point to be about a grid-square the right of the center. button) to move the points. Make the bottom-left and bottom-right points an equal distance from the top-center point. Move the middle-bottom point to be about a grid-square the right of the center.
  To make the shape more accurate, we will need to curve the lines. Click on the "Convert Point" Tool (the To make the shape more accurate, we will need to curve the lines. Click on the "Convert Point" Tool (the  button). This will allow us to make Bezier curves at each point. Your object should have roughly the same shape as the second screen shot. button). This will allow us to make Bezier curves at each point. Your object should have roughly the same shape as the second screen shot.
 When you are satisfied with the shape (feel free to experiment with the line curvature), we will need to color the 'A' shape. To open the color sets, go to "Windows" > "Browser" and click on the "Shaders" tab. Since this part of the communicator is a silver color, click on "Silver" (in the category, "Metals") and click the "Apply" button (in the lower-left side of the "Browser" window). Close the "Browser" window. Note: due to the current lighting, you won't see the silver shading until later. When you are satisfied with the shape (feel free to experiment with the line curvature), we will need to color the 'A' shape. To open the color sets, go to "Windows" > "Browser" and click on the "Shaders" tab. Since this part of the communicator is a silver color, click on "Silver" (in the category, "Metals") and click the "Apply" button (in the lower-left side of the "Browser" window). Close the "Browser" window. Note: due to the current lighting, you won't see the silver shading until later.
 We are now done designing the face of the 'A' part of the communicator, but we will need to give it some depth. Go to "View" > "Preset Positions" > "Reference" to see the object. Adjust the depth by dragging the purple line on either the right-hand wall or the ground. To make sure the line is straight, hold down the "Shift" key while dragging the line. (For this tutorial, I have made the purple line 2 grid-squares in length, but you can adjust it to suit your taste.) We are now done designing the face of the 'A' part of the communicator, but we will need to give it some depth. Go to "View" > "Preset Positions" > "Reference" to see the object. Adjust the depth by dragging the purple line on either the right-hand wall or the ground. To make sure the line is straight, hold down the "Shift" key while dragging the line. (For this tutorial, I have made the purple line 2 grid-squares in length, but you can adjust it to suit your taste.)
 And when you are satisfied with both the shape and depth of the object, click the "Done" button (in the lower-left side of the window). You will now be back at the "Perspective" Window. The object will probably be off-centered. To make things easier we will center it in the window: go to "Arrange" > "Send To Origin". And when you are satisfied with both the shape and depth of the object, click the "Done" button (in the lower-left side of the window). You will now be back at the "Perspective" Window. The object will probably be off-centered. To make things easier we will center it in the window: go to "Arrange" > "Send To Origin".
 Optional: at any time, you could save this object as a Ray Dream Studio file. Optional: at any time, you could save this object as a Ray Dream Studio file.
 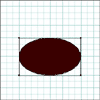 Second, we will create the oval part of the communicator. As before, click on the "Free Form" Tool and drag it to the Perspective window. Second, we will create the oval part of the communicator. As before, click on the "Free Form" Tool and drag it to the Perspective window.
 In the Name box, let's call this object "Oval". In the Name box, let's call this object "Oval".
 Go to "View" > "Preset Position" > "Drawing Plan" to create the object. Go to "View" > "Preset Position" > "Drawing Plan" to create the object.
 Click on the "Draw Rectangle" Tool (the Click on the "Draw Rectangle" Tool (the  button) and hold down the mouse to access the "shape" mini-menu. Select the "Draw Oval" Tool (the button) and hold down the mouse to access the "shape" mini-menu. Select the "Draw Oval" Tool (the  button). button).
 Draw an oval similar to the one shown in the screen shot to the right. Draw an oval similar to the one shown in the screen shot to the right.
 We will now need to color the oval shape. Again, open the color sets: go to "Windows" > "Browser" and click on the "Shaders" tab. Since this part of the communicator is a gold color, click on "Polished Gold" (in the category, "Metals") and click the "Apply" button (in the lower-left side of the "Browser" window). Note: due to the column size, you may only see the word "Polished..."- this is the correct color. Close the "Browser" window. Again, due to the current lighting, you won't see the shading until later. We will now need to color the oval shape. Again, open the color sets: go to "Windows" > "Browser" and click on the "Shaders" tab. Since this part of the communicator is a gold color, click on "Polished Gold" (in the category, "Metals") and click the "Apply" button (in the lower-left side of the "Browser" window). Note: due to the column size, you may only see the word "Polished..."- this is the correct color. Close the "Browser" window. Again, due to the current lighting, you won't see the shading until later.
 We are now done designing the face of the oval part of the communicator, but we will need to give it some depth. Go to "View" > "Preset Positions" > "Reference" to see the object. Adjust the depth by dragging the purple line on either the right-hand wall or the ground. (For this tutorial, I have made the purple line 1 grid-squares in length, but you can adjust it to suit your taste.) We are now done designing the face of the oval part of the communicator, but we will need to give it some depth. Go to "View" > "Preset Positions" > "Reference" to see the object. Adjust the depth by dragging the purple line on either the right-hand wall or the ground. (For this tutorial, I have made the purple line 1 grid-squares in length, but you can adjust it to suit your taste.)
 As with the previous object, when you are satisfied with both the shape and depth of the object, click the "Done" button (in the lower-left side of the window). You will now be back at the "Perspective" Window. The object will probably be off-centered also. To make things easier we will center it in the window: go to "Arrange" > "Send To Origin". The two objects should now be looking very close to the final communicator. As with the previous object, when you are satisfied with both the shape and depth of the object, click the "Done" button (in the lower-left side of the window). You will now be back at the "Perspective" Window. The object will probably be off-centered also. To make things easier we will center it in the window: go to "Arrange" > "Send To Origin". The two objects should now be looking very close to the final communicator.
 To further refine the final shape, we will need to adjust the placement of the oval object. Go to "View" > "Preset Position" > "Front". For the best view, zoom in to a "8:1" viewpoint: click on the ratio at the bottom-left of the window so the mini-menu is displayed and select "8:1". To further refine the final shape, we will need to adjust the placement of the oval object. Go to "View" > "Preset Position" > "Front". For the best view, zoom in to a "8:1" viewpoint: click on the ratio at the bottom-left of the window so the mini-menu is displayed and select "8:1".
 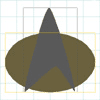 Select the oval shape by clicking on it (it may already be selected). To move it, drag it anywhere on the screen. To resize it, drag the 4 corners. Move and resize the oval to suit your taste, or make it look like the screen shot to the right. Remember, if you drag it too far (or just don't like its position, you can always select "Send to Origin" again). Select the oval shape by clicking on it (it may already be selected). To move it, drag it anywhere on the screen. To resize it, drag the 4 corners. Move and resize the oval to suit your taste, or make it look like the screen shot to the right. Remember, if you drag it too far (or just don't like its position, you can always select "Send to Origin" again).
 To align the objects easily, follow these steps: To align the objects easily, follow these steps:
| |
 To show the "Alignment" window, go to "Arrange" > "Align Objects". To show the "Alignment" window, go to "Arrange" > "Align Objects".
 Click on the "A" object and then click on the Oval object. Click on the "A" object and then click on the Oval object.
 In the Alignment window, click on the "Axis" pull-down menu and select "Y". Click the "Align" button and then click on the "Box Min" button. This aligns the objects on the Y-axis, on their back edges. In the Alignment window, click on the "Axis" pull-down menu and select "Y". Click the "Align" button and then click on the "Box Min" button. This aligns the objects on the Y-axis, on their back edges.
 Now, click on "Axis" pull-down menu again and select "Z". Click the "Align" button and then click on the "Box Min" button. This aligns the objects on the Z-axis on their bottom edges. Now, click on "Axis" pull-down menu again and select "Z". Click the "Align" button and then click on the "Box Min" button. This aligns the objects on the Z-axis on their bottom edges.
|
 To be safe, go ahead and save these objects as a Ray Dream Studio file. To be safe, go ahead and save these objects as a Ray Dream Studio file.
 With both objects selected, we will group them into one: go to "Arrange" > "Group". (You will see a big, black "bounding box" instead of two, colored "bounding boxes".) With both objects selected, we will group them into one: go to "Arrange" > "Group". (You will see a big, black "bounding box" instead of two, colored "bounding boxes".)
 We can now export this grouped object into a file format that can be read by Poser: go to "File" > "Export". In the Export dialog box, select "WaveFront (.obj)" as the file type. Click the "Options" button and be sure to check the option for "Export Texture Maps" (this will allow you to later edit the different colors). Choose where you want to save the file, type in a name, and click the "OK" button. We can now export this grouped object into a file format that can be read by Poser: go to "File" > "Export". In the Export dialog box, select "WaveFront (.obj)" as the file type. Click the "Options" button and be sure to check the option for "Export Texture Maps" (this will allow you to later edit the different colors). Choose where you want to save the file, type in a name, and click the "OK" button.
For this tutorial, let's change where we save the obj file: go to your Poser folder, then Runtime, then Geometries, then JHoagland. (You can use any folder under the "Geometries" folder, but remember where you save the file.) Save the file with the name "communicator.obj".
 Optional: If you like, you can now close Ray Dream Studio. Optional: If you like, you can now close Ray Dream Studio.
|


 button) and drag it into the Perspective window.
 You should get a box that asks for the name of the Free Form object. Let's call it "Emblem" (type that word into the box and click the "OK" button).
 button), click on the grid to create 4 points as shown in the screen shot to the right. Ray Dream Studio will automatically draw lines to connect the points, and clicking (a second time) on the first point will "close" the shape. (For now, don't worry if your shape is "pretty" or a different color, we will change both of these options later.)
 button) to move the points. Make the bottom-left and bottom-right points an equal distance from the top-center point. Move the middle-bottom point to be about a grid-square the right of the center.
 To make the shape more accurate, we will need to curve the lines. Click on the "Convert Point" Tool (the
  button). This will allow us to make Bezier curves at each point. Your object should have roughly the same shape as the second screen shot.
 Second, we will create the oval part of the communicator. As before, click on the "Free Form" Tool and drag it to the Perspective window.
 button) and hold down the mouse to access the "shape" mini-menu. Select the "Draw Oval" Tool (the
  button).
 Select the oval shape by clicking on it (it may already be selected). To move it, drag it anywhere on the screen. To resize it, drag the 4 corners. Move and resize the oval to suit your taste, or make it look like the screen shot to the right. Remember, if you drag it too far (or just don't like its position, you can always select "Send to Origin" again).
