Make a Refrigerator Figure
Page 1: Building the Object
So, you've followed the tutorial on how to make your own props (from obj files)... and now you want to make figures with moveable parts. But how do you do it? This tutorial is similar to the previous Making a Refrigerator Prop, but this one shows you how to turn an object into a Poser figure (instead of a prop).
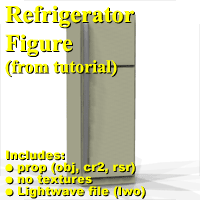
(The finished refrigerator figure, click to download.)
Applications used:
 Lightwave
Steps:
1. Open Lightwave and start building the refrigerator.
 Open Lightwave Modeler and make sure you have a blank scene. Open Lightwave Modeler and make sure you have a blank scene.
Since the refrigerator is basically a few boxes (and a handle), let's create a box.
Go to the Create tab (you're probably on it already), then look under "Objects", and click on the Box tool (or press X).
Bring up the Numeric Panel (n). A typical refrigerator is about 6ft x 2ft x 2ft (with a center point at 3ft); however, we will build this refrigerator to the scale of the Poser people:
To keep things simple, we'll assume the height of the P4 Male is just under 6 feet (some people say his height is about 5ft, 10 inches). If you import the P4 Casual Male into Lightwave, you'll see that the "6ft mark" is actually 700 mm.
So, the new values for our refrigerator would be: 700 mm high x 233.33 mm wide x 233.33 mm deep (233.33 is 1/3 of 700). To keep things easy, though, we'll use the following values: 700 mm x 235 mm x 235 mm.
The up/ down center point (the Y-axis) will be half of 700 mm, so type in "700 mm / 2" in the "Center Y" field... or just type "350 mm".
|
As you hit "Tab" to move between the fields, the box will be created. Click the "X" button to close the Numeric Panel and hit "Enter" to create the box.
Hit "A" to zoom in and center your box.
|
2. Now that we have a box, let's set the base color.
 Bring up the Surfaces panel by hitting the "q" key. Bring up the Surfaces panel by hitting the "q" key.
Note: Lightwave calls the coloring "Surfaces", while Poser calls it "Materials"- either way, it means the same: the color or texture of the object.
Here's where things start to get a little tricky:
Since Lightwave can't export obj files with grouping information, we need to use a workaround. (The "group information" tells Poser which polygons belong to what body parts.)
Our workaround will be to name all of the surfaces with the following naming convention: "part_material".
Later, we will split apart the "part_material" lines into separate group and material lines.
|
Since this box is going to be the main base of our refrigerator, the part will be called "base". And since this is the outside of the refrigerator, the material will be called "exterior". So, for the name of the surface, type in "base_exterior".
Two notes:
Do NOT name any parts with the word "body"- this is used by Poser to control the entire object. Instead, you should use part names like "hip" (for humanoid figures) or "hull" or "base" (for mechanical-type figures).
Although you can use any combination of upper and lower case, case does matter: "hull" is considered a separate body part from "Hull". Also, I recommend that you be consistent: if you use lower case words, use lower case on all parts and materials.
|
Change the color to whatever you like- the color value will not be imported into Poser and we'll need to change it later anyway. (I'll keep it the default gray color.)
As a side note: you will probably want to use different colors for each material. This way, you can quickly see which polygons belong to which parts and materials.
|
3. Next, we'll have to create sections to "cut" so we can have an interior.
 Before we start making any cuts, though, make sure you are in "Polygon Selection" mode. Click on the word "Polygons ^H" (at the bottom of the screen) so it is lit. (You can also hit the space bar to move between editting modes: Points, Polygons, and Volume.) Before we start making any cuts, though, make sure you are in "Polygon Selection" mode. Click on the word "Polygons ^H" (at the bottom of the screen) so it is lit. (You can also hit the space bar to move between editting modes: Points, Polygons, and Volume.)
In the Perspective window, click on *only* the front polygon. It should look like the image to the right.
|
4. Let's make some cuts to form the squares that will become the interior.
 We'll need to use the Knife tool. So, go to the Construct tab, then look under "Subdivide" and click on the Knife tool (or press K). We'll need to use the Knife tool. So, go to the Construct tab, then look under "Subdivide" and click on the Knife tool (or press K).
In the Back (or Front) view, move your pointer to Y: 675 mm.
Drag the mouse across the box. You should create a straight, yellow line, like the image to the right.
Hit the Enter key to apply the knife and cut the polygon.
|
5. Let's make some more cuts.
 Repeat the process, making horizontal cuts at 505 mm, 475 mm, and 50 mm. Note: whenever you hit Enter, you "drop" your current tool. Either click on the Knife tool or press K to continue working with it. Repeat the process, making horizontal cuts at 505 mm, 475 mm, and 50 mm. Note: whenever you hit Enter, you "drop" your current tool. Either click on the Knife tool or press K to continue working with it.
Now, make two vertical cuts, at: -100 mm and 100 mm.
Your box should look like the image to the right.
|
Note: A word of "caution": some of you may be familiar with modeling programs already... and you may be thinking it would be easier to do a boolean cut than all of this knifing. You are correct in that it would be easier... except for one major issue: Poser does not like boolean-ed objects. If you import an object that has had boolean cuts, you will get strange things: vertexes out of place, odd or flipped polygons, and other artifacts. For this reason, it is very important to never boolean-cut an object that is meant to be used in Poser.
6. Let's create the interior section.
 Deselect all of the polygons you have created by pressing the / key. Deselect all of the polygons you have created by pressing the / key.
In the Perspective view, carefully select only the top and bottom interior boxes, as shown in the image to the right.
Hint: Click on the first polygon to select it, then hold down the "Shift" key and click on another polygon to add to your selection.
Hint 2: If you select the wrong polygon, you can de-select it by holding down the "Ctrl" key and clicking on it again.
|
7. Let's change the color of the soon-to-be-interior.
 With the two polygons still selected, bring up the Surfaces panel (q). With the two polygons still selected, bring up the Surfaces panel (q).
These polygons are still part of the "base" part, but we'll want to assign them to a material called "interior"
Change the name to "base_interior" and change the color to white. (This way, we can distinguish the interior from the exterior.
|
8. Now to actually form the interior.
 With the two polygons still selected, switch to the Bevel tool: go to the Multiply tab, then look under "Extend" and click on the Bevel tool (or press b). With the two polygons still selected, switch to the Bevel tool: go to the Multiply tab, then look under "Extend" and click on the Bevel tool (or press b).
In the Top view, click and drag the mouse downwards. This will move the yellow line upwards. Adjust to suit your taste- this will be the depth of the refrigerator's shelves.
Note: you can also bring up the Numeric Panel for the Bevel tool. I used a setting of Shift: -215 mm (and left the rest of the settings at 0). Again, hit Enter to apply your changes (and drop the bevel tool).
We are finished with the interior, so hit the / key to deselect all of the polygons.
|
And now we have a decent refrigerator body. Now, to work on the doors. Even though these will be separate parts, we'll build them on separate layers just to keep things easier.
A side note: you may want to save your Lightwave object now, just to be safe. Name the file whatever you like- it has no effect on the exported object... but be sure to add the ".lwo" extension to the name of the file.
9. Build the freezer door.
 We'll want to build the doors on Layer 2, so click on the top of the Layer 2 button. Then, click on the bottom of the Layer 1 button to put it in the background. (You should see the black outline of the refrigerator body.) We'll want to build the doors on Layer 2, so click on the top of the Layer 2 button. Then, click on the bottom of the Layer 1 button to put it in the background. (You should see the black outline of the refrigerator body.)
Next, switch to the Box tool (X) and draw a box so it covers the top opening... or just see the image to the right.
After you hit the Enter key to create the box, it will be entirely white (and using the "base_interior" surface)... let's fix this:
Bring up the Surfaces panel (q), change the name to "freezerdoor_exterior", and change the color to anything you like (I used green).
|

Next, select the polygon that is closest to our refrigerator base. Since this is the inside of the freezer door, we need to assign it to the interior material.
Bring up the Surfaces panel (q) again, change the name to "freezerdoor_interior", and change the color to anything you like. I used a different shade of green just so I would know that green surfaces are the freezer door.
|
10. Build the lower door. The steps are basically the same as the freezer door.
 Switch to the Box tool (X) and draw another box so it covers the lower opening... or just see the values in the image to the right. Switch to the Box tool (X) and draw another box so it covers the lower opening... or just see the values in the image to the right.
Hint: If you immediately bring up the Numeric Panel (n), you can re-use the settings for the freezer door. All you need to do is adjust the "Height" and "Center Y" values.
After you hit the Enter key to create the box, this box will be the same color as the freezer door: the "freezerdoor_interior" material. Like the freezer door, let's fix this:
Select only the lower box (six polygons)- this will become the lower door.
Bring up the Surfaces panel (q), change the name to "lowerdoor_exterior", and change the color to anything you like (I used red).
Deselect all of the polygons.
Like we did with the freezer door, select only the polygon that is closest to our refrigerator base. Since this is the inside of the lower door, we need to assign it to the interior material.
Bring up the Surfaces panel (q) again, change the name to "lowerdoor_interior", and change the color to anything you like. I used a different shade of red just so I would know that red surfaces are the lower door.
|
And now we have a decent refrigerator body with doors. But, it will be a little hard to open without handles!
A side note: you may want to save your file again, just to be safe. If you already saved it earlier, just hit the s key to save it again.
11. Let's build the handles.
 We'll want to build the handles on another layer, so click on the top of Layer 4 button. (Yes, that's right- Layer 4. Just keep reading, it will make sense in a few minutes.) Then click on the bottom of the Layer 2 button to put it in the background. We'll want to build the handles on another layer, so click on the top of Layer 4 button. (Yes, that's right- Layer 4. Just keep reading, it will make sense in a few minutes.) Then click on the bottom of the Layer 2 button to put it in the background.
Now, we'll draw the shape of the handle with the Spline Draw Tool. Go to the Create tab, then look under "Elements", and click on the Spline Draw tool.
In the Back view, click once near the upper-left corner of the freezer door.
Click a second time between the two doors (being careful to draw a straight line).
Click a third time near the bottom of the lower door.
In the Side view, check to make sure that the upper and lower points just touch the edge of the door. If they don't, drag the points to the left (or right) as needed.
The middle point should be slightly "above" the door edge. Also drag this point as needed.
This will be the curve for the door handle. Feel free to adjust the points to suit your taste, but it should look similar to the image to the right.
Hit the Enter key to draw the curve and drop the Spline Draw tool.
(Since this is only a guide, we don't need to change the surface.)
|
12. Let's build the handle shape.
Click on the top of the Layer 3 button to switch to that layer and click on the bottom of the Layer 4 button to put it in the background.
Now, we'll draw the shape of the handle with the Disc Tool. Go to the Create tab, then look under "Objects", and click on the Disc tool.
Unlike the handle we created for our refrigerator in the "prop" tutorial, let's create a smooth, metal handle. We'll want a 24-sided disc which we'll "extrude" along the path we created in the previous step.
In the Top view, draw a disc around the top point of the curve. See the image to the right for the settings.
Note: Be very careful to make sure that the disc has no height (the "Radius Y" setting should be 0). If there is any width (even 1mm), the disc will not extrude properly.
Click the "x" to close the Numeric Disc Tool, then hit the Enter key to drop the Disc Tool.
| 

|
13. Extrude the handle shape.
 Let's zoom out so we can see the entire object: hit the "a" key. Let's zoom out so we can see the entire object: hit the "a" key.
Now, we need to make the disc follow the path that we created earlier. This is called a "Rail Extrude".
Go to the Multiply tab, then look under "Extend" and then click on the "Rail Extrude" tool.
Click on the "Automatic" option, uncheck the "Oriented" option, and then click the "OK" button.
You should now have a nice, smooth door handle, like the image to the right.
|
14. Of course, most refrigerators have two handles... so, let's cut this apart.
We'll need to cut the polygons that are approximately between the two doors.
First, let's add Layer 2 to the background: Hold down the Ctrl key and click on the bottom of Layer 2. (You should see the black outline of the doors.)
In the Right view, zoom in until you can easily see the polygons near the doors.
(Make sure you are in Polygon Selection Mode.) Click and drag your mouse (slowly) across the polygons to in the middle to select them. (At the bottom of your screen, above the "Points" button, you should see the words "Set: 24". This tells you that all 24 polygons are selected.) It should look like the image to the right.
We'll cut these polygons in half by using the Knife Tool: hit the "K" key to switch to the Knife Tool.
In the Right view, drag a line through these polygons at 480 mm high, or use the values in the image to the right. (Since we ware cutting polygons along the Y axis, the X and Z values are irrelevant.)
The result will look like the second image to the right: you'll now have 48 polygons selected instead of 24.
Deselect the bottom 24 polygons by dragging your mouse over them.
Remove the still-selected, top 24 polygons by hitting the "Del" key. You should now have a hole in your door handle between the freezer and bottom doors.
|


|
15. Let's assign the door handles to the correct doors.
Zoom out slightly so you can see all of the polygons that will become the upper door handle.
Select these polygons by holding down the right-mouse button and dragging- this will draw a blue lasso around the polygons to be selected.
These polygons will be part of the freezer door, but with a metal material.
Bring up the Surfaces panel (q) again, change the name to "freezerdoor_metal", and change the color to anything you like. (I used light blue.)
Now, let's assign the other polygons to the lower door. You can de-select the selected polygons and select the de-selected polygons in one step: hit the " key.
Bring up the Surfaces panel (q) again, change the name to "lowerdoor_metal", and change the color to anything you like. (I used medium blue.)
You can de-select all the polygons by hitting the "/" key.
|

|
16. Now to finish off the handles. We'll need to draw some boxes to cover the edges of the handles.
Zoom in slightly so you can get a better view of the top and bottom edges of the door handles.
Switch to the Box tool and draw a box that covers the top of the bottom handle *and* meets the edge of the door. Or, see the image to the right for the settings.
(Remember to hit the Enter key to make the box and drop the Box tool.)
(This box will automatically be given the previously-used surface, in this case, the "lowerdoor_metal" material.)
Use the Box tool to draw another box that covers the bottom of the upper handle *and* meets the edge of the door. Or, see the second image to the right for the settings.
(Remember to hit the Enter key to make the box and drop the Box tool.)
After you drop the tool, you should have two boxes covering the ends of the handles, like the third image to the right.
Like before, this box will also be given the previously-used surface. Let's recolor the upper box:
Again, select the top box (six polygons) by holding down the right-mouse button and dragging.
Bring up the Surfaces panel (q) again, and select "freezerdoor_metal", from the pull-down list. (In my case, the box turns a light blue color.)
You can de-select all the polygons by hitting the "/" key.
|
|


|
And that's it! You now have a basic refrigerator object. Hit the "A" key to fit the entire object in the view ports to see what it looks like. To see the entire, combined-layers object, hold down the Shift key and click on the top of the buttons for Layers 1-3. (Remember, Layer 4 was the "extrusion path" for the door handles- it's not used on the final object.)
A side note: you may want to save the file again, just to be safe. If you already saved it earlier, just hit the s key.
Tip: You may have noticed that the metal handles look too sharp-edged to be realistic, rounded handles. How do we "correct" this? Back in step 12, we could have created a polygon with more than 24 sides- the more sides, the move smoothness, right? Actually, this is a common mistake that a lot of modelers make: they add more polygons hoping to add smoothness to an object.
However, every single 3-D application (including Lightwave and Poser) will automatically smooth polygons if the angle between them is less than a certain setting.
In Lightwave, you can change this setting manually. In fact, let's go ahead and adjust the "metal" materials to have a more smoothed look:
Zoom in until you can see the sharp edges of the door handles.
Click the "Surface Editor" button.
Click on the "freezerdoor_metal" material.
Next, we'll select the other "metal" material: hold down the "Ctrl" key and click on the "lowerdoor_metal" material.
Click the checkbox for "Smoothing".
The default value is 89.53 degrees, which is too high for our use. Click on the number "89.53" and type "43" instead. As you do this, you'll see the door handles become smoother. (Yes, you can zoom in and out to see the entire door handles, even when the Surface Editor window is open.)
Click the "X" at the top of the window to close the Surface Editor.
Note 1: Remember that the smoothing angle will only work in Lightwave- this setting will NOT be exported with the obj file. However, when we open UV Mapper (on the next page of the tutorial), we can use the "split vertices" command so the object will look just as smooth in Poser as the one we're working with in Lightwave.
Note 2: Why did I use a splitting angle of 43 degrees. This is the default angle on which the free version of UV Mapper splits the vertices. When you purchase UV Mapper Pro, you can split vertices on any angle. As you become more proficient at creating models, you may find that the 43 degree smoothing angle it too much- you may be smoothing sections of your model that shouldn't be smooth. In this case, you'll need to use UV Mapper Pro instead.
Note 3: You can also use the Surface Editor to change a material's color, add a map, or add procedural texture. Keep in mind that none of these features will be exported with the obj file.
|

|
In Poser, the smoothing angle is automatically set to 179.5 degrees. This means that 90 degree corners will get smoothed... and your refrigerator could look like a bloated box!
On the next page of this tutorial, I will show you the process to make sharp-edged objects in Poser by using the "split vertices" command in UV Mapper.
The lesson here is to NOT to make your model with so many polygons that it chokes the average user's computer. I have seen models in the marketplace (and for free) which boast the fact that they have over 150,000 polygons... and I've seen some models with more than 450,000 polygons! Does your model need that level of detail? The sad fact is that most of those polygons are NOT used for details- they are used to make the curved parts look more rounded... something that could have (and should have) been done by the 3-D application. In other words, why do you need 50,000 polygons on a rounded ship's hull when you can use one-half (or one-third) as many polygons and let the software's "smoothing angle" smooth the hull?
Think realistically when you work on your model: although a 450,000 polygon object may be a work of art, how many people will be able to use it, especially when you start loading textures on to the model? If you're selling it, how many people will not purchase it because the polygon count is too high?
On the other hand, you don't want to have so few polygons that your model looks "dented" when viewed from the side. You'll want to find that "happy medium" where your model has a high polygon count to see detail, but a low enough polygon count that users don't need a high-end computer.
Anyway, let's continue on to Page 2: Exporting and Importing.


