Steps:
- The first step to compositing objects is to start at the "end", meaning that you should decide what image you will be using for your background before you start working in Poser. You should also decide how large you want your final image to be- will it be the size of your background image or will you reduce the size to post it on a website?
For this example, I will be making a scene where Sheri is standing on the beach, pulling on her shirt. The background image is a photograph I took of the beach. The final image size will be the same as the beach picture: 800x600 pixels. - Next, we will need to open Poser and create our scene. For this example, I will keep things simple by only using one character, but feel free to experiment on your own.
 Start Poser, add your characters, pose them, and add any clothing and textures to suit your taste.
- (For this example, Sheri is wearing the T-Shirt and Bikini Bottom clothes that came with Poser. The pose is the "Pulling on Shirt" pose from my Assorted Female Poses, available on the Goodies Page. And the bikini bottom texture is from the Black Stripe Texture, also available on the Goodies Page.)
- Next, we will need to change the background color- it can be either the "standard" gray or a bright green or a bright blue, or a color similar to the background image. You may want to experiment with the colors to see which one will give you the best results.
In this example, I will use the "standard" gray background.- The final step before rendering is to decide on the size of final Poser render, which, in turn, will depend on the size of your final image (or background image). A good "rule of thumb" is to render your Poser scene at a height which is about 1.5 times that of your final image. You will then need to reduce the size of your scene, which will decrease the sharpness, which will make the scene look more realistic. Again, though, experiment to find out which size is best for your taste (and your computer's abilities!).
(Remember, you can set the final render size by going to "Render" > "Render Options")
In this example, the height of the final image is 600 pixels, so I will render my Poser scene at a height of 900 pixels.- Render your scene and save the image... remembering where you saved it and what you named it!
- Next start Photoshop
- Open your background image.
For this example, I will be using a photograph I took of the beach, called "beach001.jpg". For more images like this, check out my Beach Pictures Set and Beach Pictures Set 2 products, available for sale here.- Open your Poser render (and make it the front-most image).
For this example, I called my render "Render1". (I know, I know, it's not very imaginative!)- Now things get a little tricky: we will need to remove the color background from the Poser render image.
- Click on the Magic Wand Tool (the
 button).
- You will probably have to adjust the "Magic Wand Options" to suit your taste, but here are the options that I used:
- Next, click on the background color. You will now see "jagged lines" around the selection.
- Select the color in the entire image by going to "Select" > "Similar".
- We now have the background color selected, but we actually need the non-background selected. "Inverse" the selection by going to "Select" > "Inverse".
- Now that the non-background information is selected, we will need to move it onto the background image: Click on the "Move Tool" (the
 button).
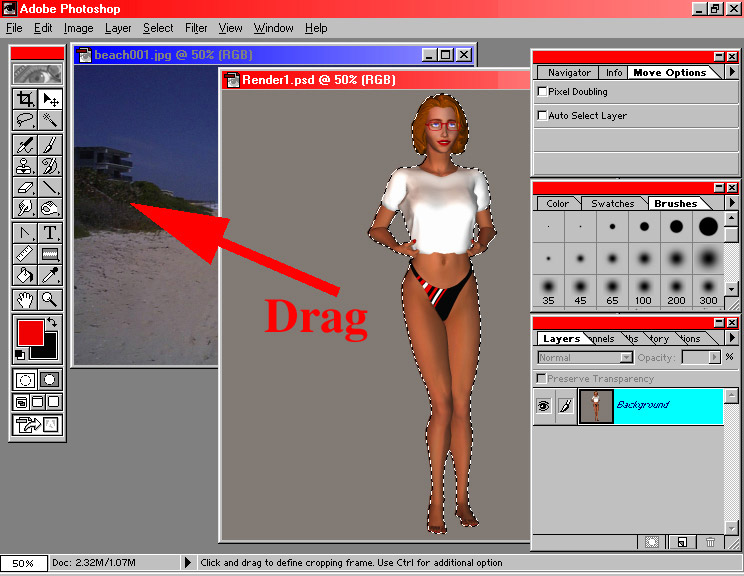
- Click and drag your Poser render onto your background image.
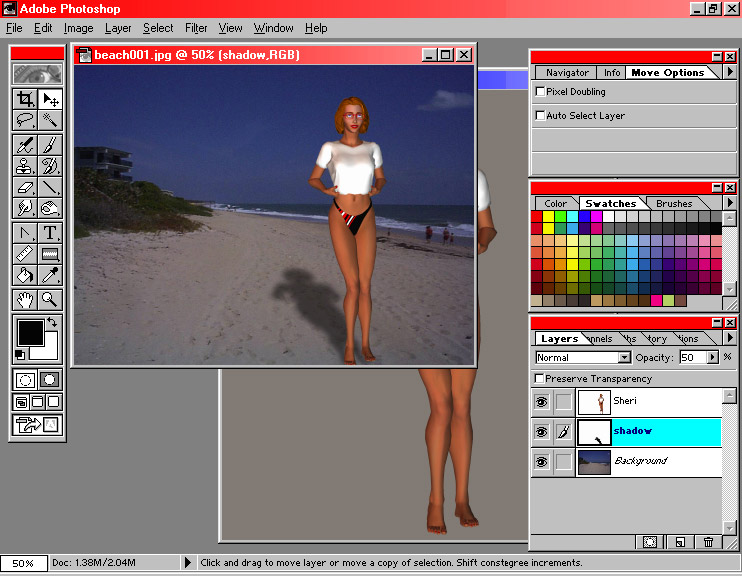
- Your image should now look like the following screen shot:
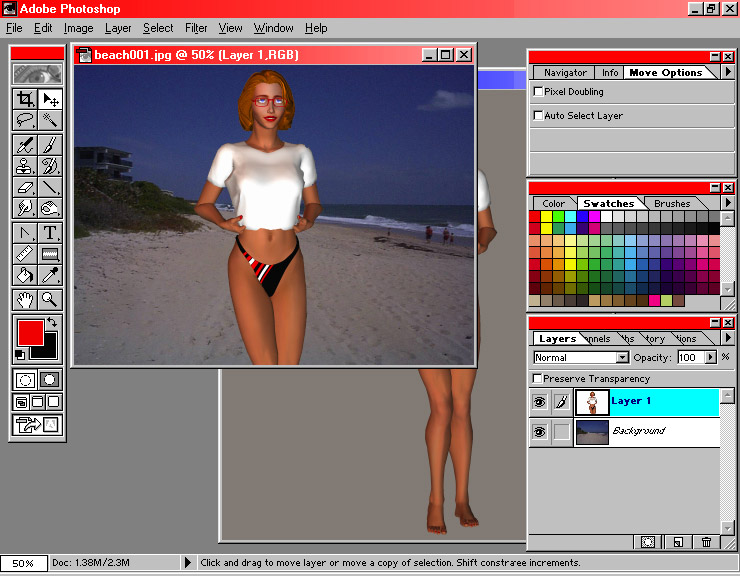
- As you can probably tell, the Poser image is way too big for the background.
- To reduce the size of the Poser image (which is now called "Layer 1"):
- Go to: "Edit" > "Transform" > "Scale". This will create a "rescaling box" around the Layer.
- Click on a corner of the "rescaling box", hold down the "Shift" key (to maintain the correct proportions), and drag towards the center of the image.
- When you release the mouse button, the image will redisplay. You can move it around by clicking (inside the box) and dragging.
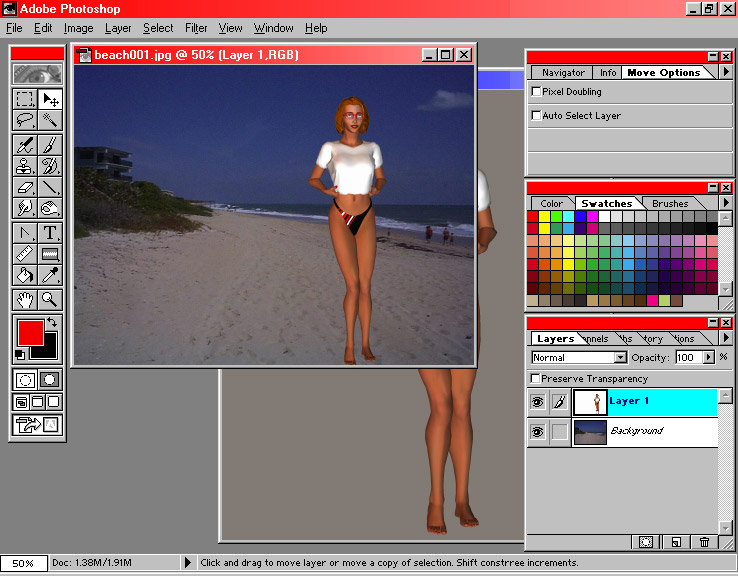
- Your image should now look like the following screen shot:
Note: Since your Poser image is on a separate layer from the background, you can still move it around by using the Move Tool.- You are done! You can now save this image.
- Open your background image.
- Let's keep going and add a shadow to the scene. We will do this by copying the Poser image, angling it, and changing the color:
- First, we need to rename "Layer 1" to something more useful, such as your character's name. Double-click on "Layer 1", type in a new name, and press the "Enter" key.
For this example, I'll name it "Sheri".- Next, we will need to make a copy of the Layer by dragging the Layer onto the "New Layer" button. (See the screen shots below:
Step 1 and Step 2- Next, give this "copy layer" a more descriptive name, such as "shadow".
- Since shadows are a solid color, we will now need to colorize the layer:
- Since we only want to colorize the "image" part of the layer (and not the whole layer), in the "Layers Pallette", check the "Preserve Transparency" option.
- Change your foreground color to black.
- Next, fill the image with the foreground color by going to "Edit" > "Fill" and click the "Ok" button. (You don't need to change any options on this dialog box.
Your image will now have a "black hole" where the layer was. - You can uncheck the "Preserve Transparency" option.
- To make the "shadow"look like it's on the ground, we will need to adjust the angle. Go to "Edit" > "Transform" > "Distort".
Move the "Distort Box" until you get the angle that suits your taste; when you decide on the placement of the image, press the "Enter" key to apply the "distort" change.- The shadow should be beneath the character (not above it!), so we need to move the "shadow" layer so it is between the "character" layer and the "background" layer.
- But, the shadow is very sharp- we'll need to soften it:
- First, we'll blur the edges of the shadow. Go to: "Filter" > "Blur" > "Gaussian Blur". Adjust the "Radius" to suit your taste- I used a setting of "5". Click the "Ok" button when you're done.
- To lighten the shadow, simply adjust the "Opacity" in the "Layers Palette". (A setting of 25 to 50% should be good.)
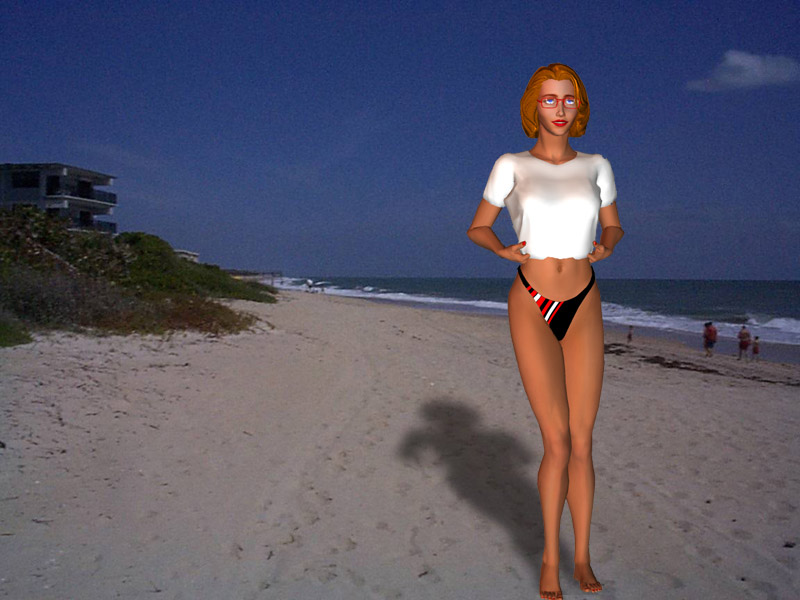
- Your image is finished and should now look like the following screen shot:
Here is the final "flattened" JPEG image: 
- First, we need to rename "Layer 1" to something more useful, such as your character's name. Double-click on "Layer 1", type in a new name, and press the "Enter" key.
- Save your image (in Photoshop format) and you're all done!
Note: if you want to save your image in a file format other than Photoshop, you will have to either "Flatten Image" (in the "Layers Palette") or go to either "File" > "Save a Copy..." or "File" > "Save for Web".
I know you're probably asking, "That seems like a lot of work! Why can't I just import the picture into Poser, using the "File" > "Import" > "Background Picture" method?" Well, my answer is: certainly you can! But, the idea behind compositing an image is that you can keep control over all of the separate elements. You are free to add anything to the picture, including other images or renders from other 3-D programs. You're also free to move everything around (in Photoshop) after the scene has been rendered. And this means that you're not limited to only using Poser to make your image. For this example, I could have just as easily used a Bryce-generated background instead of a beach photograph.
To see examples of compositing, see the following images in the Image Gallery: Flash, Poser Gangsters, The Far Side- The Real Reason Dinosaurs Became Extinct, JLA- A Midsummers Nightmare, Have we Gone too far in the Name of Security, Michelle- Virtual Tutor, Michelle at Epcot, A Pleasantville Scene, Clinton Deploys Vowels to Bosnia, Happy New Year, Star Wars: Episode I Teaser Poster, Star Wars: Episode II- Attack of the Clones Movie Poster, Tabby 4-Panel Head, Star Wars Movie Poster, The Empire Strikes Back Teaser Poster, Revenge of the Jedi Movie Poster, and Return of the Jedi Movie Poster.
