By now, everyone should know how to add a piece of clothing to the Figures Library. But, what about a complete outfit, made up of individual pieces of clothing?
The process works like this: you add additional pieces of clothing to the scene and conform them to a "base" piece (such as a dress or shirt). Then, when you add the shirt back to the Library, Poser will ask if you want to add the conformed clothing as well. And there you go- the outfit is added! In this tutorial, I will show how to make a dress-socks-shoes outfit for Vicky.
Applications used:
 Poser 4 or above
Steps:
1. Open Poser and start with a blank scene. Do NOT add a human figure (such as Mike or Vicky or the P4 People).
2. Next, add the first piece of clothing. Try to start with the a large piece of clothing, such as a dress, suit, shirt, pants, etc.
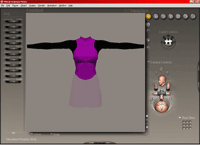
In this example, I've added the dress to the scene.
Add colors, textures, reflections, bump maps, etc. to suit your taste (or use a MAT pose to apply these changes). In this example, I've added a purple and black texture map and a "dress short" transparency map.
Normally, you would now conform the clothing to the human figure, but since we don't have a human figure, we will NOT conform this clothing to anything. Instead, this first piece of clothing will be our "conform-to" object.
Important: do NOT pose or move this piece of clothing; however, you can adjust any morphs (such as "Lengthen").
|
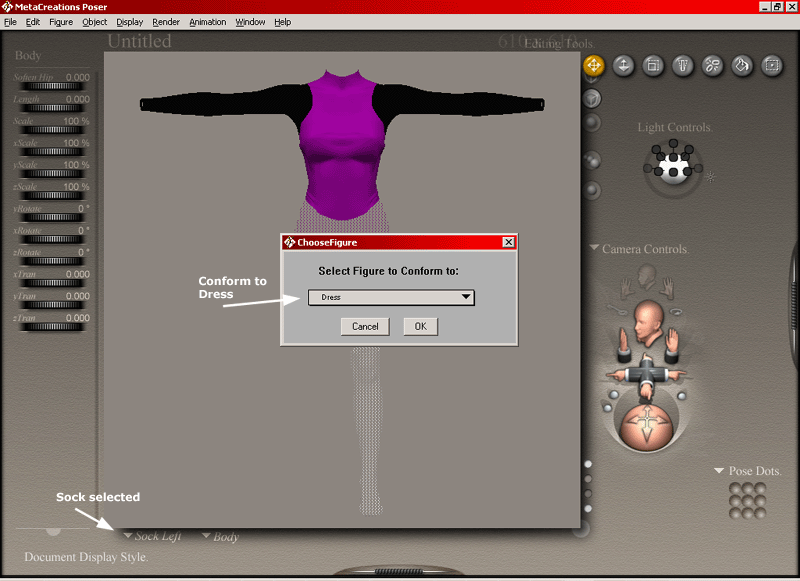
3. Now, add the next piece of clothing.

In this example, I've added the sock.
Like the previous step, add colors, textures, reflections, bump maps, etc. to suit your taste (or use a MAT pose to apply these changes). In this example, I've added a "short sock" transparency map.
Now, conform the sock to the dress: Figure > Conform, select the Dress, and hit the "OK" button
If the piece of clothing flies off or srunches or does something weird, don't worry- when we conform it to a human figure (in Step #7), it will look correct.
|
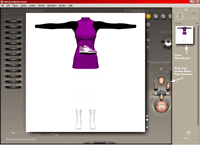
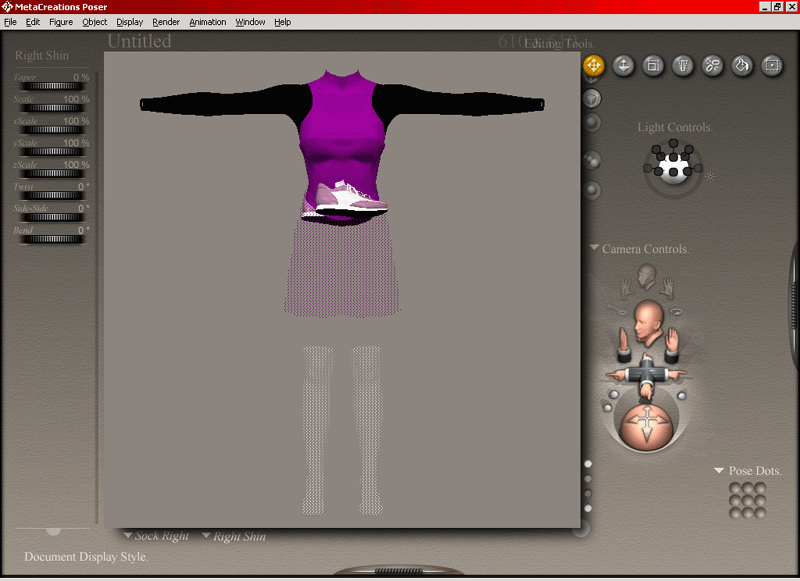
4. Repeat Step #3 for each additional piece of clothing.
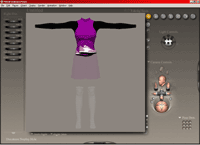
In this example, I've added the other sock and the running shoes.
If you look carefully, the shoes do not appear to be in the correct place- this is because Poser is trying to conform the shoes to the figure's Feet. In this case, the Dress has no Feet, so the shoes are conformed to the hip instead! You may see the same thing occur if you conform gloves to socks- since socks do not have Forearms or Shoulders, the gloves may wind up in a strange location.
|
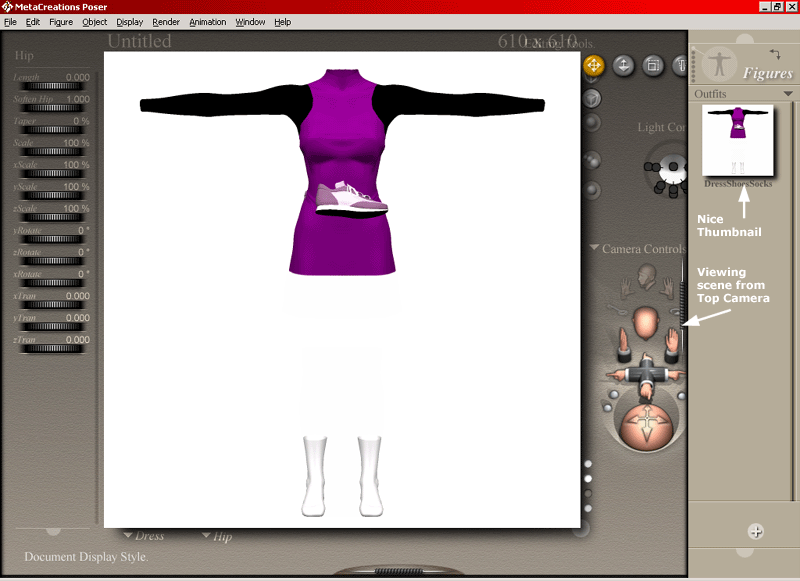
5. Now, let's add this outfit to the Library.
5a. Optional: Make a nice thumbnail:
Suppose a piece of clothing in your outfit has a transparency map. And suppose that you want a nice render of your outfit as a thumbnail image. You could follow my tutorial (found on the General Tips Page) on making your own thumbnnail... but, since we're adding a new entry to the Library (rather than replacing an existing thumbnail), here's an easier method:
Make sure your document window is square: go to Window > Document Window Size. You can use any size, but the width and height must be equal.
Next, set your lights, your camera angle, and your Render Options (shadows? use bump maps?). In this example, I've changed the background color to white.
Render the scene.
Paste this image onto the background: Display > Paste onto Background.
Select another camera- the Top Camera will work nicely.
Move the camera (NOT the object) so that your outfit can not be seen by the camera- all you should see is the rendered image. For example, move the top camera to the right (which moves the outfit to the left) until you can't see the outfit.
Now, go back to step 5 and add the outfit to the Library- you should see your nice thumbnail appear.
Note: Even though you can't see your outfit in the document window, don't worry- it has been added to the Library correctly and will load into the scene correctly. If you move any of the clothing (or use the Hierarchy Editor to hide anything), the outfit may not load into the next scene correctly.
Note 2: Don't forget that you can render your outfit against any color or background image.
|
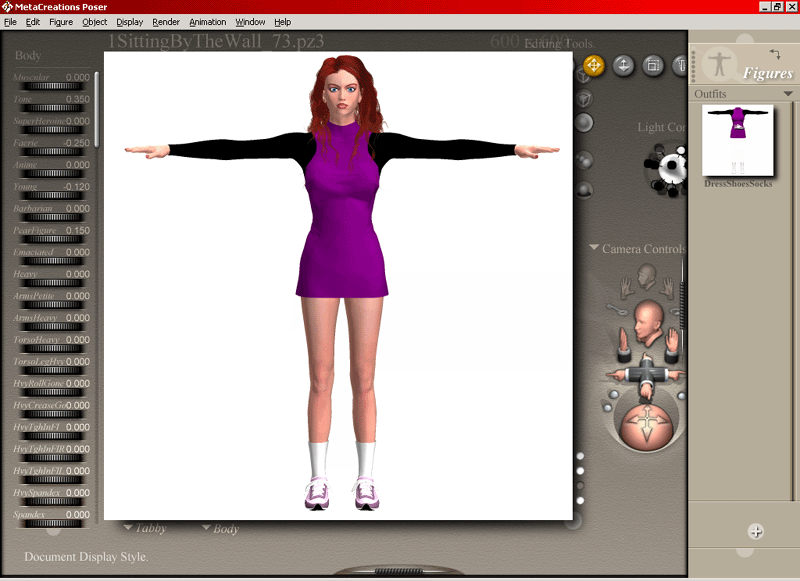
Your outfit has now been added to the Figures Library, with all of its clothing pieces textured... and ready to be worn by your character. So, let's go ahead and load a character!
6. File > Load a character of your choice or go to File > New Scene to start from scratch.
|
Give your character any texture, change the shape, give it hair, etc... but don't pose it yet. In this example, I'll use my Tabby character.
|
7. Add your outfit to the scene.
You're all done! Pose your character, add props or other figures, adjust the lighting, add hair (if needed), and render the scene.
And here are some of the many benefits:
You now have another copy of your clothing, just in case something happens to your original file.
You can combine similar pieces of clothing into one outfit and remove the extra files from your Library. (I recommend zipping or backing up the files before you actually remove them.) For example, you could combine the Bikini Top and Bikini Bottom into one outfit: "Bikini". Continue this process with any other outfit that has a top and bottom... and see how many entries you can remove!

 button) to add the outfit.
 button). Despite what the Poser 5 manual says, do NOT double-click on the outfit- Poser will ask you to replace the current figure (your human character) with the new figure (the outfit).