
Have you seen the images on Facebook that let you move your phone to look around the scene? Did you know that these 360 degree images can be made fairly easily in DAZ Studio? Here's how!
Note 1: You'll need DAZ Studio 4.10 or higher since version 4.09 doesn't support the spherical camera lens.
Note 2: I didn't come up with this idea, but this is an expanded version with screen shots showing which options to set.
Click any of the images for a larger version.
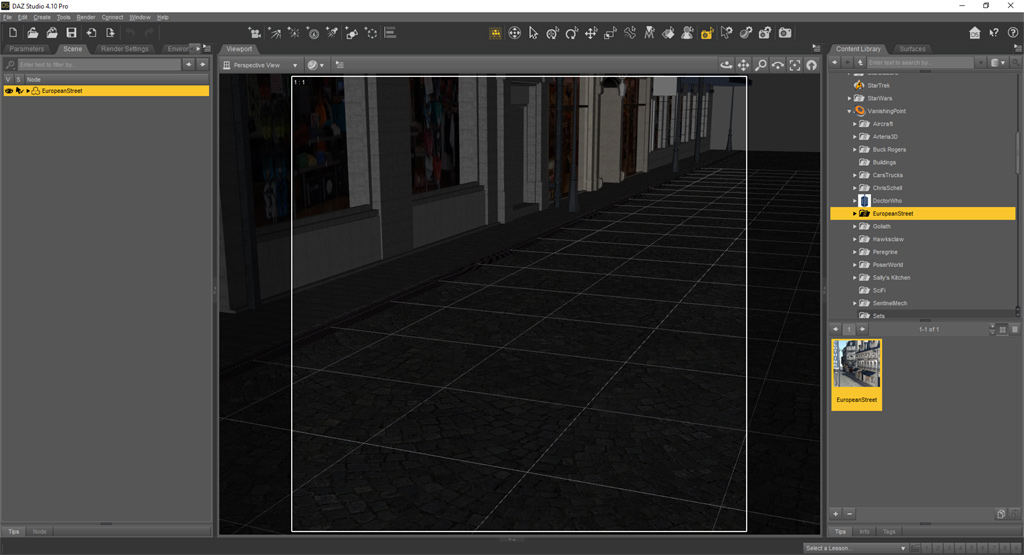
| 1) Start DAZ Studio.
Add a model to the scene. I recommend using an interior set since so there's something to see from all angles. Add people to the scene and pose them to suit your taste. For this example, I'll be using the European Street, available at the Vanishing Point marketplace (link opens in a new window). |
|
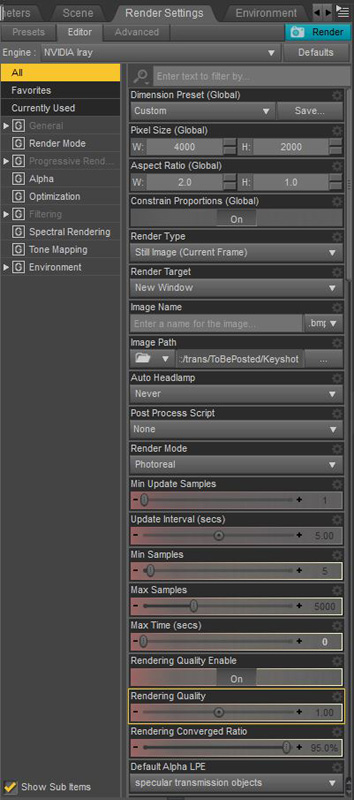
| 2a) Set the render settings:
Click the Render Settings tab. • Set the renderer to Iray. • Change the Aspect Ratio to 2:1. • Set the Pixel Size to at least 2000 x 1000 minimum (after setting the Aspect Ratio.) - A setting of 4000x2000 works nicely, but make sure you have a decent video card or it may take a while for the scene to render. • Scroll down a little bit and set the Max Samples to a high value; the default value of 5000 should be fine. • Set the Max Time (secs) to 0 so the render won't stop after a specific length of time. Note: If you're using a model that's not fully enclosed (such as the European Street), click the Environment tab and set the Backdrop: either a solid color or browse for an image. - In this example, I'm using a background image of some clouds. |
|
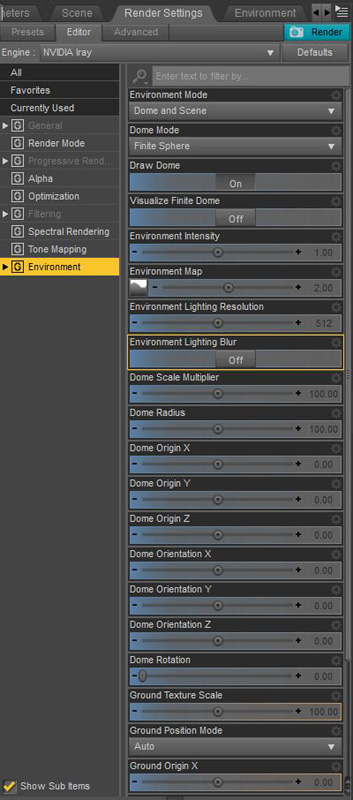
| 2b) HDRI rendering
Scroll down the Render Settings or click on "Environment" on the left. For interior sets, I recommend turning off the HDRI skydome: - Under Environment Mode, select Scene Only. For exterior sets (again, such as the European Street), I recommend turning on the skydome. - Under Environment Mode, select Dome and Scene. - For the Environment Map, select an HDRI file. In this example, I'm using a "studio light" image. |
|
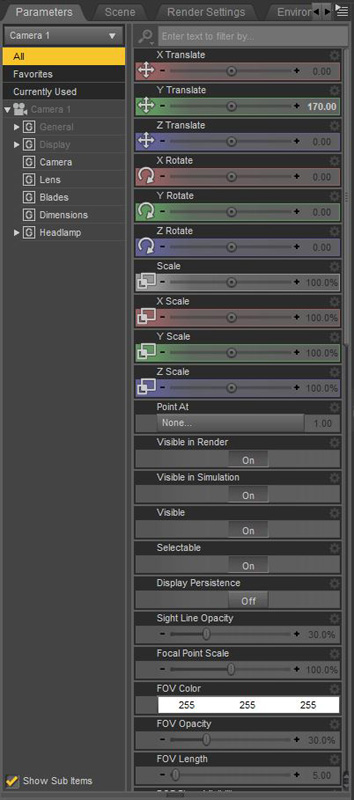
| 3a) Set the camera settings, 1.
• Add a new camera to the scene. - On the "Create New Camera" pop-up box, click Accept to use the default settings. - Optional: give this camera a name. For this example, I'll use the default name of "Camera 1". • On the Scene tab, select your camera. In this example, it's Camera 1. • (Be sure to click "All" on the left to be able to adjust all the settings.) • First, let's move the camera to the center of the scene: - Set the left-to-right value (X Translate) to 0. - Set the up-down value (Y Translate) to suit your taste; a value of 170 to 172 will be approximately the eye-height of a person. - Set the front-back value (Z Translate) to suit your taste. - Note: these are meant as a starting point and you might need to adjust the camera location to suit the needs of the scene. • Set all of the rotation dials (X Rotate, Y Rotate, and Z Rotate) to 0. • Hint: Slide the Y Rotation dial left-to-right to see what the camera will see when the final image is rendered. In some cases, you might need to move the camera so it's not passing through a wall. |
|
| 3b) Set the camera settings, 2.
• Scroll down the camera settings. • Set the Lens Distortion Type to spherical. - This step is important because this lens setting will tell Facebook to turn the render into a 360 degree image. • (There's no need to change the other settings.) • For Headlamp Mode: - Some people say to turn it off and some people say to set it to Auto; feel free to adjust this setting to see which works best for your scene. | 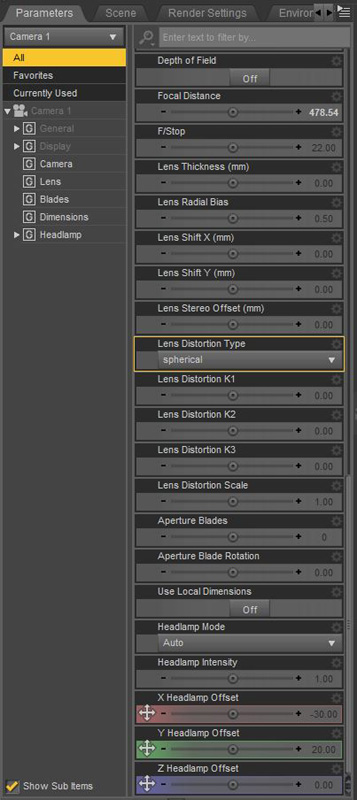
|
| 4) Render the scene: click the Render button.
Get coffee, a snack, or watch TV as your image renders. Your finished image should look like the image to the left. Yes, the extreme fish-eye look is correct- that's the effect from the Spherical Lens. I recommend saving to bmp format since it's "lossless", but you can use any format you prefer. Don't forget where you save the image to. I recommend re-saving the image in jpg format to compress it. Use your favorite image-editting software for this step. |
|
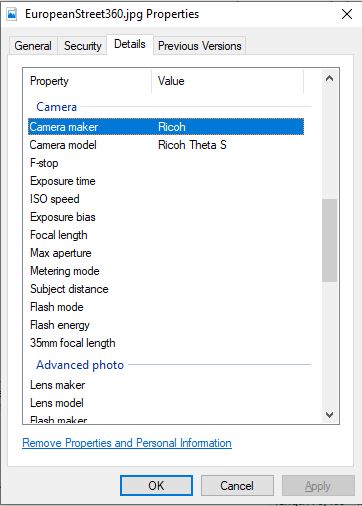
| 5) In Windows Explorer:
• Go to the folder where you saved the image. • Right-click on the image and select Properties. • Click on the Details tab. • Scroll down to Camera settings. • Click in the Camera maker field and type in: Ricoh • Click in the Camera model field, enter: Ricoh Theta S - You could probably use another camera maker or camera model, but I've found these settings work fine. • Click the OK button when done. This step is also important since these settings also tell Facebook to turn the render into a 360 degree image. |
|
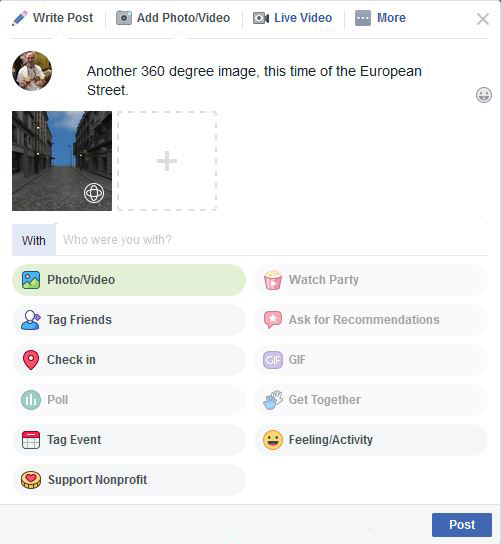
| 6) Open your web browser and log into Facebook.
• Click "Write Post" to a post a message to your timeline or to a group. • Click the "Photo/ Video" button to upload an image. Then browse to where you saved the image. • Wait a minute and Facebook will convert it to a 360 degree version. - You'll know it worked if there's a circular "rotate" icon in the lower-right of the image. • Click the Post button to post it to Facebook. - After the image is posted, you can use your mouse to rotate the image or move your mobile device to rotate the image. |
|
| And that's it! You're all done! | |
